





إجراء فحص أمني
Review your account’s security settings in one pass, starting with your security score.
Run this checkup once, and again whenever you get a new device or notice anything unusual. It takes about ten minutes.
Before you begin
- Sign in to Aster Mail on a device you trust.
- Keep your authenticator app and password manager nearby.
Check your security score
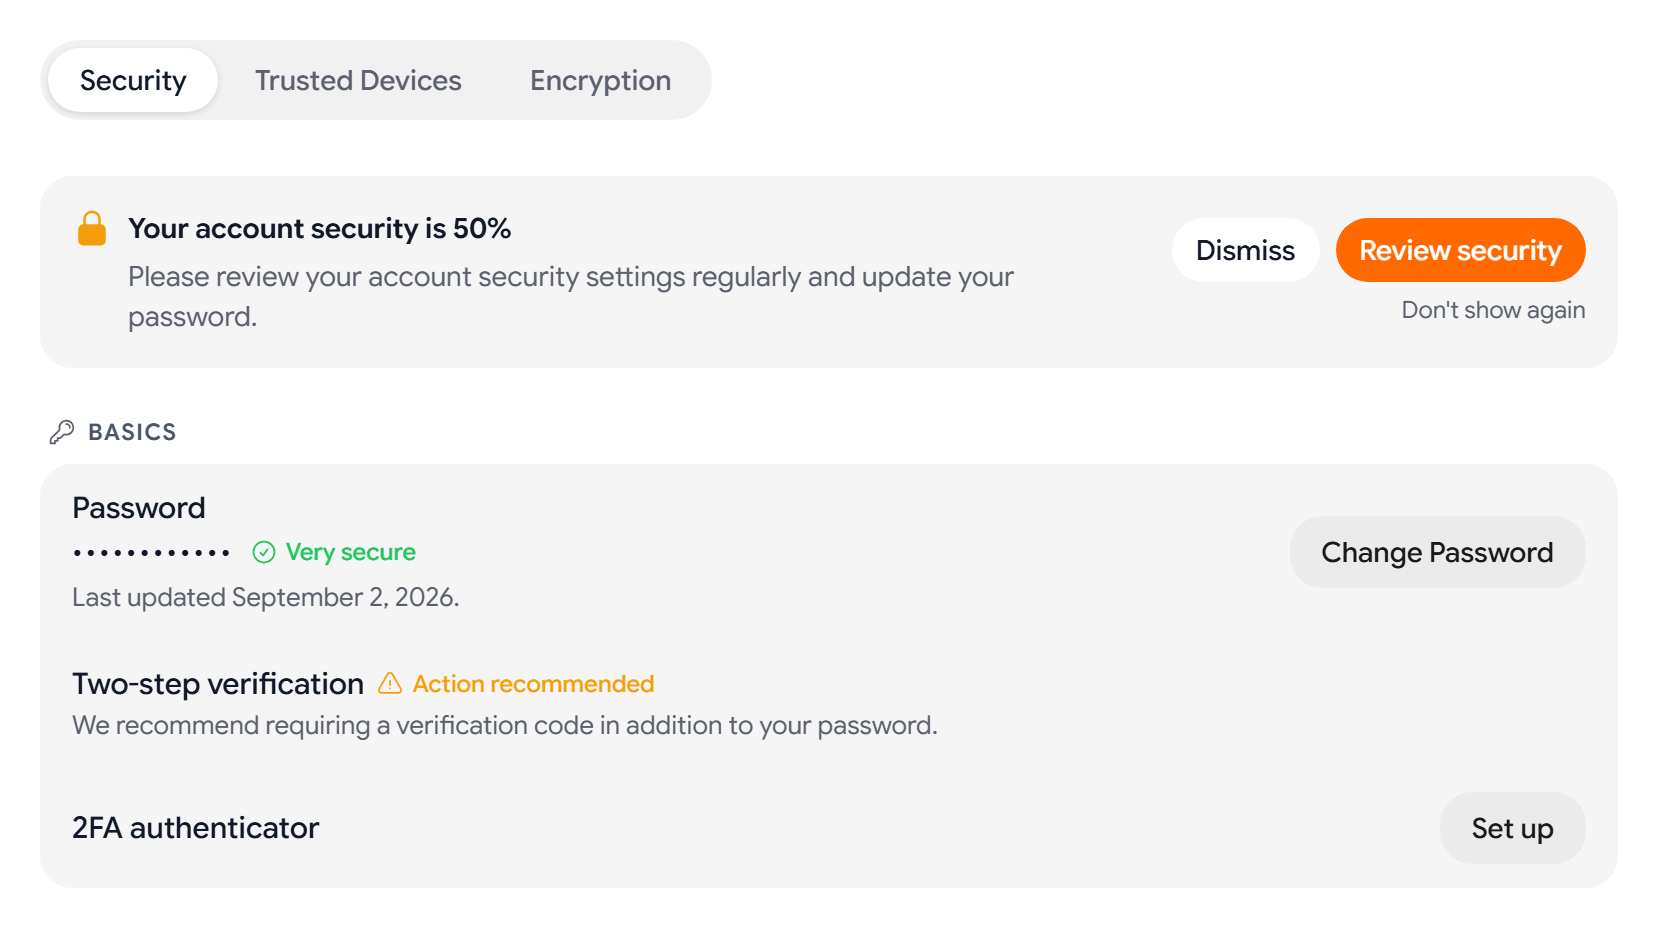
- Go to Settings > Security. At the top of the Security tab, Aster shows Your account security is followed by a percentage.
- Select Review security to open the Protection breakdown. It lists seven items and shows whether each one is on:
- Two-factor authentication
- Passkey registered
- Verified recovery email
- Login alerts
- Block Spy Pixels
- Block Remote Images
- Strip Image Metadata
- To go to an item’s setting, select the item.
The score is the share of these seven items that are on. It doesn’t check your recovery codes, sessions, or mail rules, so complete the steps below as well.
Step 1: Turn on two-factor authentication
- On the Security tab, find Two-step verification.
- Next to 2FA authenticator, select Set up, and then follow the steps in Turn on two-factor authentication.
If you used most of your backup codes or can’t find them, select Regenerate backup codes to get 10 new ones.
Step 2: Add a passkey
In Passkeys & Security Keys, select Add passkey. To learn more, see Change your password or add a passkey.
Step 3: Save recovery codes
- On the Security tab, find Account Recovery.
- If the status reads At risk: no offline recovery method, select Get codes. If you can’t find your existing codes, select Get new codes.
- Save the six codes outside your mailbox, on paper or in a password manager.
Step 4: Verify your recovery email
Go to Settings > Account and make sure your recovery email is verified and that you can still read it without Aster. To learn how, see Add a recovery email.
Step 5: Turn on login alerts
- On the Security tab, in Login Alerts & Sessions, turn on Login Alerts.
- Review Recent Sign-ins for anything you don’t recognize.
Step 6: Review devices and sessions
- In Browsers and Devices, sign out any session you no longer use.
- If you paired desktop or mobile apps, select the Trusted Devices tab and revoke any device you no longer have.
To learn more, see Review devices and sessions.
Step 7: Turn on tracking and image protection
- In Tracking Protection, turn on Block Spy Pixels.
- In Images, turn on Block Remote Images and Strip Image Metadata.
Step 8: Review Bridge access
If you use Aster Bridge, delete app passwords for mail clients you no longer use. Then go to Settings > Bridge, and in Connected installations, revoke any installation on a computer you no longer have. To learn more, see App passwords for other clients.
Step 9: Check your mail rules
Go to Settings > Mail Rules and review every rule. Someone who gets into an account often adds a forwarding or filing rule instead of deleting anything, so remove any rule you didn’t create.
Step 10: Update a weak password
If your password is short, reused, or old, change it. To learn how, see Change your password or add a passkey.
Troubleshooting
- You find a session, rule, or device you can’t explain: Sign out all other sessions, change your password, regenerate your recovery codes, and then open a support request.
- You lost access to your authenticator app: Sign in with a backup code, and then set up two-factor authentication again on your new device.
Related articles
هل كانت هذه المقالة مفيدة؟